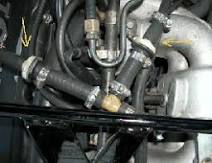
high side on ac unit

How Can B-Y Help? Have B-Y contact you Non-Condensables In An A/C system Non-condensables are gases that will not condense into a liquid within the operating temperatures of the refrigeration system. Air and nitrogen are the most likely non-condensables we will see. Air can enter a refrigeration or A/C system when improper service and evacuation procedures are not followed or when you have had a leak on the low side. Nitrogen can enter the system in other ways. The new Dry R22 A/C units and most refrigeration equipment are shipped from the factory with a holding charge of dry nitrogen, not refrigerant. Once the refrigeration lines are connected, the service valves need to be opened and all of this nitrogen holding charge must be removed. The condensing unit should then be evacuated to 500 microns along with the lines and evaporator coil. When working with precharged equipment like R410A, care needs to be taken during leak checking procedures. Some A/C manufactures require leak testing by pressurizing the system with nitrogen to 400 or even 500 PSI.

These high pressures can potentially push nitrogen past the stop valves on the condensing unit and into the condensing unit refrigerant charge. To prevent this from happening, make sure to tighten down the stop valves completely before pressure testing. The stop valves may be sealed enough to hold the R410A in but not to keep the high pressure nitrogen out. Always use a nitrogen regulator with an accurate gauge to ensure you don’t over pressurize your system.
troubleshooting ac unit not workingMake sure to check the manufactures recommendations before pressure testing.
inside ac unit will not turn on If you do get nitrogen in the system, you will have high head pressure with high sub-cooling (cool liquid line) before you get the system fully charged.
how does a residential ac unit work
Suction pressure may be low and system performance will be poor. In most cases you will have high evaporator superheat and a high suction line temperature, but superheat may be normal. To confirm, shut the system off and let the pressures equalize. Allow the condenser to cool to the outdoor air temperature. Check the pressure on the high side gauge and convert it to temperature using a PT chart. This saturated temperature should be within a couple degrees of outdoor air temperature. If this saturation temperature is any higher, you have nitrogen or non-condensables in the system. The entire charge should be removed into a clean and dry recovery cylinder. The system should be evacuated to 500 microns and recharged using new refrigerant. The old refrigerant can be reused after purging the nitrogen or non-condensables from the recovery cylinder.Our ever expanding list of articles on HVAC/R products and processes will help you get more performance out of your tools, and more time out of your day.

The Evacuation and Charge Process A vacuum pump is used to remove air and contaminants from an HVAC system, creating a vacuum state. It is important to note that a vacuum pump is not a recovery unit. A recovery unit should always be used to make sure the refrigerant is recovered from the system before you begin the vacuum process. A vacuum can help protect your system from contaminants and non-condensable gases, which can damage HVAC system components, reduce system efficiency and even cause failure. A vacuum pump “pulls” air, moisture and contaminants out of the system after it has been repaired and before it is recharged. The deeper and more complete the vacuum, the more contaminants trapped within the system components and even in the compressor oil are removed. Prior to pulling a vacuum and charging an HVAC system, you’ll want to recover, repair and check for leaks. Assuming that these items have been checked off your list, you’re ready to safely evacuate.

Before starting, fill the vacuum pump with vacuum oil. Remove the cap, open the fitting and begin pouring. Keep pouring the oil until the oil level reaches the oil line. Here you’ll benefit from a large oil fill port and sight glass, which gives you the benefit of being able to see when the oil reaches the appropriate level. It is important to note here that the quality of your vacuum pump performance is directly related to the quality of your vacuum pump oil. The cleaner your oil, the better your pump’s performance. We recommend high vacuum mineral-based oil be used in all pumps regardless of the type of oil that is used in the system. Once you can see through your sight glass that you’ve reached the proper oil level, put the fittings back on, or, if desired, attach the exhaust filter. Remove the Schrader cores (if present) with the core removal tools. Install the test and charging manifold. Connect the hoses from the manifold to the system. Connect the low side (or blue hose) to the low side core removal tool and high side (or red hose) to the high side core removal tool.

If you’re using a four-valve manifold, connect the 3/8” hose from the vacuum port on your manifold to the 3/8” port on the vacuum pump. Connect the 4th hose from the manifold to the refrigerant cylinder. If you are using an extension cord, make sure you are using the proper gauge for your pump. Plug in the power cord for the pump. Open all manifold valves and make sure the vacuum valve and core removal tool ball valves are open.For cold weather starts, open the intake port until the pump reaches running speed and then close it off. You are now pulling a vacuum. It is important that the oil level remain steady when the pump is running for proper operation – about 1/2 to 5/8 up in the sight glass. If it falls too low, the vacuum pump could be damaged. If it’s too high, it will increase the oil in the exhaust. Once you have pulled a vacuum that meets the manufacturer’s specifications, you can close the valves on the core removal tools. Observe the vacuum gauge.

It is normal operation for a rise in microns to occur. However, if the rise continues to atmosphere (760,000 microns), there is a leak in the system. Check the system manufacturer’s recommendation for tolerance. Once you are satisfied with the reading, close the valve that connects the manifold to the pump. You can now shut off and disconnect the vacuum pump. Your evacuation process is complete and you are ready for system charge. To charge, open the valve on the refrigerant cylinder. Add enough refrigerant to create a small positive pressure in the system – about 3 psi on the low side. Remove the digital vacuum gauge and complete the charging process per the manufacturer’s specifications. Once the charge is complete, you can replace the valve cores and remove the vacuum valve and core removal tools. It’s a good idea to simply replace Schrader valves, as they are not that expensive and new valves will reduce the likelihood of system leaks. Screw them back in and seat them properly.
Remove your tools and you are ready to go. Connect a digital vacuum gauge for accurate vacuum measurement. The best place to measure vacuum is at the system, not at the pump. With a combination vacuum and charging valve on your core removal tool, you can attach the electronic vacuum gauge directly to the system and isolate it from the pump, hoses and manifold for a true indication of the vacuum in the system. If you suspect an open or wet system, be sure to use the gas ballast feature on your vacuum pump. The gas ballast prevents water vapor from condensing in the vacuum pump oil by introducing a small amount of fresh air into the pumping chamber. Open the gas ballast just slightly and then begin to watch your electronic vacuum gauge. If the vacuum stays at a consistently high level of microns or doesn’t pull down below 5,000 microns, your system still contains contamination or has a leak. Repair the leak before proceeding. A way to speed the vacuum process is to use a heat gun.