troubleshooting ac unit not working

For AC Cooling Units Check Temperature in enclosure / Ambient around enclosure Is there power to the AC unit? Check for door contact or jumper at logic pins 3-4Internal fan, External fan, Compressor What is the condition of the ambient air? What is the state of the LED? Solid is normal condition Questionnaire for Failure Identification 1. AC unit not working Mains supply connected, Y/N Cabinet door open/ Bridge not set 2. AC unit not cooling Temperature setting too high Oil marks inside the unit found External fan not working 3. Cabinet temperature high Check parameter setting on the PCB, DIP-switch position Internal fan not working Th.-Exp.-valve, capillary tube broken Unit capacity limits exceeded, too high dissipation heat Ambient temperature exceeded maximum permitted temp. Shut down via HP-switch No air T-difference via evaporator Installation of E-components close to the cooled air outlet, i.e. cooled air short cut

4. Cabinet temperature low Temperature setting too low External fan working permanent Unit capacity too big, too low dissipation heat Ambient temperature exceeded minimum permitted temp. No air T- difference via evaporator 5. HP switch, Unit safety shut down External air inlet blocked External air outlet blocked
no water coming from ac unit High ambient temperature ambient temperature exceeded maximum permitted temp.
ac unit window installation 6. Lack of refrigerant
how do u clean a window ac unit Oil marks surrounding the refrigerant piping and or components Low air T- increase over the condenser Compressor power consumption low 7. Compressor not working 8. Fan not working, Internal/ External

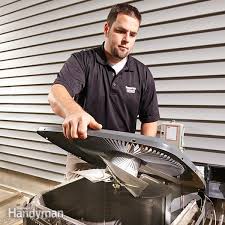
Fan start capacitor broken 9. Condensate drain fails Condensate hose is clogged Condensate hose has no slope to drain to ambient Need a little Help? Check out our video guides.Although they differ in installation, wall and window units operate in similar fashion. During the hottest days of summer, turning your air conditioner on only to be met with warm air, gurgling water or unsettling rattling is anything but cool. While complex mechanical repairs call for assistance from the pros, you can address some wall-unit woes with simple, universal troubleshooting measures, whether you have a through-the-wall unit, a window unit mounted in the wall or a split, ductless style AC. Before making any moves, always consult the owner's manual. Ensure that your AC wall unit is securely plugged into an operational electrical outlet, if the unit's plug is visible. Check your circuit breaker for a blown fuse and replace the fuse if necessary. Replace the batteries in your AC unit's remote control, if it has one.
Through-the-wall and ductless, split AC systems often include these accessories. Clear any items that may block airflow near the interior front side of the air conditioner, such as curtains, drapes, blinds or large furniture. Likewise, close any open windows or doors. Disable your unit's "quiet" or "super quiet" setting, if it has one. These settings reduce noise by reducing fan speed, which reduces cool air distribution. Power down your AC and remove the air filter, the mesh-like panel under the front grille of its interior side. In some through-the-wall and ductless systems, you may have to remove the front panel to access the filter. Wash the filter with warm, soapy water; allow it to air-dry completely before reinstalling it. For optimal operation, clean your AC's air filter monthly. Remove the front panel of the AC and use a wet-dry shop vacuum with a brush attachment to gently vacuum the interior compartment of the machine, focusing on key components such as the evaporator coils and fan blades.

As is the case with the air filter, clean components make for smooth AC operation. Inspect the intake and outlet grilles on either side of through-the-wall or split, ductless units for debris -- such as leaves or twigs -- and clear the debris by hand or with a vacuum. Sometimes a clogged condenser causes the AC to emit warm air; because condensers expel heat to the exterior of the building, a blockage means the warm air has nowhere to go but inside. If your split, ductless AC has a separate, box-like exterior unit, clear debris from the outlet grills on this unit. Tip Warning References Canoga Park Heating and Air Conditioning: Three Common Repair Problems With a Window AC UnitTrue Home: Three Air Conditioning Repair Troubleshooting TipsHorizon Services: The Horizon Comfort Zone -- Troubleshooting Your Window Air ConditionerGE Appliances: Air Conditioners -- Window Unit Not Cooling WellRepairClinic: Air Conditioner Not Cold EnoughGE Appliances: Air Conditioners -- Water SoundsRepair Clinic: Air Conditioner Is Loud or NoisyFujitsu: Troubleshooting Ductless Mini-SplitsPanasonic -- Sanyo North American Solutions Division

: Air Conditioning and Heat Pump Product Technical Training Photo Credits Yamini Chao/Digital Vision/Getty Images Suggest a CorrectionHomeHome Comfort TipsAir Conditioning RepairsHow to Fix a Broken Thermostat – Thermostat Troubleshooting Posted in: Air Conditioning Repairs Many times, a malfunctioning or broken thermostat masquerades itself as a faulty furnace. Before assuming that you have an expensive HVAC problem to deal with, first take a look at your thermostat.In our last blog post, we talked about 5 Furnace Troubleshooting Tips that can help you solve some of the most common heating problems. On the list, we talked about having your thermostat cleaned, set to “heat,” and changing its batteries, but we didn’t go very much into detail. Sometimes, your thermostat needs a little more attention. What you think is a broken thermostat may just be a neglected one.But sometimes, you may just have to break down and buy a new thermostat because of aging, faulty wiring, an old transformer, or other issues.

In this case, we highly recommend investing in and learning to use a programmable thermostat.You may also be interested in the new, high-tech “smart” thermostats, which claim to learn your habits and automatically adjust the temperature as needed. If you do end up replacing your thermostat, do not throw your old, broken thermostat in the trash, especially if it has mercury in it. Find a way to properly dispose of it or give Cassel Home Comfort a call!Before you do anything, check to see if your HVAC system has power. You don’t want to be that guy. Go over to your breaker panel and make sure your HVAC system is getting power. The next step is checking to see if your thermostat has power:This is definitely the first thing you will want to check before moving on to the more complicated stuff. All thermostats are different, with some requiring battery changes and others not needing batteries at all. For wireless systems, use AA Lithium batteries instead of the weaker regular ones. Watch this video to figure out which kind of thermostat you have and how you can change its batteries:Another simple fix, usually for older electromechanical thermostats, is a simple dusting with a small paintbrush, or other soft brush.
Now that you know how to open up your thermostat’s housing from the video above, you can now open it up for some light cleaning. Dust and dirt are often the cause for inaccurate temperature readings and other problems. Lightly dust the inside of your thermostat, including the metal coils and contact plates. If you brush can’t fit in between the contact plates, try sliding a soft paper back and forth to clean them.This may seem obvious, but you’d be surprised how many homeowners overlook this problem: your thermostat needs to be away from heat sources and direct sunlight. If your thermostat is near a lamp, computer, or any other source of heat, the thermostat’s temperature reading will be off and will send the wrong commands to your furnace or air conditioner.Using a level device, make sure your thermostat is perfectly level. If your thermostat isn’t completely straight, then your mercury switch will not work properly/accurately.Well, not really, but it will be exciting to see if this fixes your problem.

To adjust the anticipator, open up your thermostat’s housing and look for a small metal tab next to a scale from shorter to longer. If your HVAC systems cycles on and off too frequently or not frequently enough, adjusting your anticipator will usually solve the problem.: There is one last thing you can try to get your heat and thermostat working again:Hopefully, this “reboot” was what you needed to get your heat back on. In any case, it is highly recommended that you have annual HVAC inspections for your heating and air conditioning.Most manufacturers warranties require them for warranty claims and they have been proven to save homeowners time, money, and energy in the long run.If you are still confused about thermostats and how they work, let Mr. Wizard teach you:If these 5 Thermostat Troubleshooting Tips didn’t fix your broken thermostat and/or HVAC system, the professionals at Cassel Home Comfort will be glad to help.We will also show you simple maintenance tasks that you can do yourself to maximize the efficiency and effectiveness of your HVAC system and thermostat.

For more information, see our Expert Tips & Tricks and FAQ page.Don’t live with a broken thermostat any longer; call Cassel Home Comfort! We’ll be more than happy to answer all of your questions – (217) 352-2800Remember to leave the more complicated tasks and anything dealing with wiring and electricity to the professionals. Messing around with complicated and dangerous equipment is not worth any potential benefits.Cassel Home Comfort is your go-to source for all of your Illinois heating and cooling needs, including zone-based heating & cooling and air filtration and purification.If you need help troubleshooting your thermostat or HVAC problems, call your home comfort experts at (217) 352-2800 for your free Whole Home Inspection and Analysis. We are available 24 hours a day, 7 days a week to answer any questions you may have.We also offer an ongoing Home Maintenance Plan to help ensure your heating and cooling system is at its highest efficiency levels and lasts a long time.