troubleshooting ac unit not cooling

These are probably the most common Summer-Time HVAC-related complaints! But first things first, please check all of the obvious things (listed below), before scheduling a service-call. Is the thermostat set to "cool" and turned down below room temperature? Is the Power on to the indoor unit? Did you check the breaker? Is the Power on to the outdoor unit? If yes to these, is the outdoor unit running? If no, see if the outdoor unit has a red reset button (most Rheem equipment does, located near refrigerant lines), and push it. If that didn't work, see if you have a condensate pump at the indoor unit. If you do, some pumps have a safety switch that shuts off the outdoor unit if the pump overfills and fails to pump. So check the pump to see if it is working. If that wasn't the problem, back outside at the unit there should be a disconnect box mounted on the wall. These come in many styles. Some have an on-off switch, some have a pull-out plug. Some have a circuit breaker and some even have fuses.

If it has a breaker, make sure it didn't trip. If it has fuses, they should be checked. Caution: High Voltage, danger of electrocution. Please do not attempt this unless you are familiar with working with electricity. For more possible causes as to why your outdoor unit isn't running, please see: If you have checked all of these things, and your unit still isn't running, then you should schedule a service-call.
in wall ac unit covers If your outdoor and indoor units are BOTH RUNNING, BUT NOT COOLING, make sure that all windows and doors are closed, your supply and return vents are open - not blocked, and that your air filter is clean.
ac unit for computer caseIf no problems there, then you should probably turn the air conditioning off and schedule a service-call.
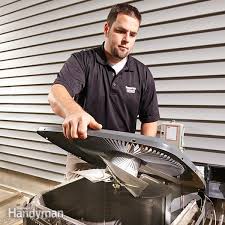
home ac units components
Refrigerant flow-related problem - restriction Poor efficiency- needs cleaning and servicing Duct leak in unconditioned space Outdoor coils damaged or very dirtyTechnicians usually have air conditioner troubleshooting guide in them after having gone through different kinds of problem in the field. Central air conditioning system usually have electronic control system that indicate the type of error or failure in the system.Electronic controls are becoming more sophisticated and greatly help in troubleshooting of big system. There are electronic systems that can be remotely controlled or monitored and they are usually installed in mission critical type of environment. Some of the possible causes of failure in the system are listed in the air conditioner troubleshooting Go To Air Conditioner Troubleshooting Guide 1 Back To Air Conditioner Troubleshooting Home PageSupport - Sensi Thermostat Looking for printable guides or video tutorials? If you’ve installed the Sensi thermostat and now find that your cooling does not turn on, proceed through the following steps until the issue is resolved.

First, make sure your HVAC equipment power switch is turned on. Most cooling equipment has a power switch, on or near the furnace or air handler that looks like a light switch. Make sure it is turned on. Next, make sure the furnace door or air handler panel is in proper position. A loose or improperly installed blower compartment door or furnace panel can keep the equipment from operating. Make sure it’s squarely in place so it will engage the safety switch inside the cabinet. Then, reset your breaker At the main home electrical panel, turn the HVAC equipment breaker off, then turn it back on to reset the breaker. If your cooling system still does not turn on, follow the steps below to determine if the issue is related to the thermostat. Working directly on the thermostat – not through the Sensi app — set the thermostat to the COOL Mode. Raise the setpoint a few degrees above the room temperature. After 10 seconds, lower the setpoint below the room temperature by a few degrees.

Within a few seconds the thermostat should make a soft clicking sound and “Cooling” should appear on the screen near the “Set To” temperature - indicating that your thermostat is operating properly, even if the cooling does not come on. If this happens, skip the thermostat reset detailed below in step 5. Note: If the setpoint is flashing on the screen there will be a maximum 5 minute delay before the thermostat clicks. If the thermostat does NOT click then you should reset the thermostat. Slightly pull on both sides of the thermostat to remove the faceplate from the wall. Remove the two AA batteries and press the Menu button so the screen goes blank. Reinsert the batteries and place the faceplate back on the wall. You should hear the faceplate snap in place on the subbase connected to the wall. After one minute, the thermostat should reset. Repeat steps 1-4 above. If the thermostat still does NOT click and “Cooling” does not appear on the screen, replace the thermostat.

Next, tighten the wire connections. Pull the thermostat off the sub-base and check to make sure the wires are firmly connected to the thermostat terminals. If not, reattach or tighten them with a small screwdriver and reattach the thermostat to the sub-base. Be sure that the thermostat fits securely to the sub-base. If thermostat wiring protrudes too far past the sub-base, or if you did not use the wall screws that were provided, this can prevent your system from turning on. If your cooling system still does not turn on, confirm that you labeled and installed your wires properly. Open the Sensi app. If a thermostat is not yet registered to your account, the app should bring you directly to the Installation Overview. Choose the first option to install and connect your thermostat. If the thermostat is already connected, tap the menu icon in the upper left corner (three lines), tap “Account,” and then “Install Thermostat.” Walk through the step-by-step installation process to ensure you have entered your old wiring correctly, and labeled the wires according to the instructions provided by the app.
If you followed the recommendation to take a picture of your old thermostat wiring, you may want to reference it here. Does your old thermostat have two sets of terminal labels? Learn more here and be sure you’re entering the correct terminals that correspond to your system type (Conventional or Heat Pump). The table below shows what each terminal letter represents. Power for cooling, 24V. Then, check that your Sensi thermostat is configured correctly for your system type. When completing the installation and connection path within the Sensi app, your thermostat will be configured automatically based on the wiring that you entered. However, if you do not complete the connection process right away, or if your thermostat is wired incorrectly, it may need to be reconfigured to reflect your system type. On the thermostat, press the Menu button. Press “Next” two times until you reach “Setup Outdoor.” Outdoor settings: If you have a heat pump, this should be set to “HP1.”

If you have a conventional air conditioning unit, this should read "AC1.” If you have more than one stage of cooling, change this to “HP2” or “AC2” to represent this. Press “Next” one time to reach “Setup Indoor.” Indoor settings: If you have a gas furnace, oil burner, or boiler system, this should be set to "GA1" which represents a single stage gas heating system. If you have an electric furnace, this should be set to "EL1." If you have more than one stage, change this to "GA2" or "EL2” to represent this. Once you've selected the choice that best describes your equipment, press “Exit.” Next, test power using a multi-meter. If no system components are turning on, and if you have a multi-meter (or voltmeter), test voltage at the thermostat to verify that your system has power. In this example, we’ll measure voltage for a cooling system. Set the multi-meter to AC (200 preferred). Place one probe on terminal screw RC. Place the second probe on terminal screw Y to test power at the outdoor compressor.