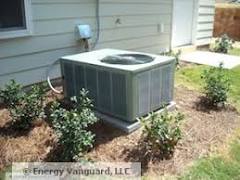
screen around ac unit

2 Additional Years of Protection 1 Additional Year of Protection 2-Year Housewares Extended Protection Plan 1-Year Housewares Extended Protection Plan & FREE Shipping on orders over $49. Sold by Cynergy Corporation/Versalift Systems and Fulfilled by Amazon. Fulfillment by Amazon (FBA) is a service we offer sellers that lets them store their products in Amazon's fulfillment centers, and we directly pack, ship, and provide customer service for these products. Something we hope you'll especially enjoy: FBA items qualify for FREE Shipping and . If you're a seller, Fulfillment by Amazon can help you increase your sales. We invite you to learn more about Fulfillment by Amazon Air Conditioner Protector Filter Screen - Condensor Maintenance Helps to Protect from Leaves, Animal Hair, and Grass Clippings - Saves on Maintenance - 100% Money Back Guarantee - Cynergy Kleen Screen FREE Shipping on orders over $49. DetailsPremierAcCovers - Leaf Guard Summer Open Mesh Air Conditioner Cover - Keeps Out Leaves, Cottonwood…

FREE Shipping on orders over $49. DetailsPremierAcCovers - BLACK - 32x32 Leaf Guard Summer Open Mesh Air Conditioner Cover - Keeps Out Leaves… Protects your A/C from clogging debris! The new Kleen-Screen stops grass clippings, lint, pet hair, dandelion, milkweed, cottonwood, insects, and other airborne debris from getting drawn into your coils and restricting the air flow.
how to size a house for an ac unitClogged coils make your A/C run longer cycles, which increases wear, wastes energy, and costs you money!
why is my window ac unit frozenClean coils save you money and energy!
window ac units not in windowPatented Kleen-Screen keeps your coils clean year-around so your A/C can operate at peak efficiency, reducing wear, saving energy and reducing your electric bills!

Installs in minutes with only scissors! The unique Kleen-Screen System custom fits to your A/C condenser unit, adjusting to fit coil areas up to 39” tall x 120” around! Installation takes only minutes using scissors with the easy step-by-step instructions. 40.1 x 3.5 x 2 inches 3 pounds (View shipping rates and policies) 4.1 out of 5 stars #273,719 in Home and Kitchen (See Top 100 in Home and Kitchen) #125 in Home & Kitchen > Heating, Cooling & Air Quality > Air Conditioners & Accessories > Air Conditioner Accessories Product Warranty: For warranty information about this product, please click here Would you like to give feedback on images? Would you like to tell us about a lower price? See questions and answers See all 47 customer reviews See all 47 customer reviews (newest first) Most Recent Customer Reviews The item arrived quickly. I opened the box and set up the items to compare to the instructions. It took about an hour to install because you have to cut and measure everything.

Working perfectly to keep the dreaded flying cotton out of the A/C this Summer! Wondering why we didn't invest in a filter screen before now. easy to install,cotton just started and it is collecting and easy to 'dust off' !!! showed to our air conditioner guy who wants to get some for his customers Screen is actually very good; however, installation instructions weren't very clear, and the retaining straps don't work very well. Fast shipping and good product. Installed in minutes, wish i had it a long time ago. I just purchased a new unit so I used the screen on it. worked like a charm, I used it for two window units. Made a huge difference, love it. This is a great idea. I wish I had bought it when my air conditioner was new. It was very easy to install. I barely had to read the directions. Set up an Amazon Giveaway Learn more about Amazon Giveaway Back in 2012 I shared my experience replacing a post on our pergola that had suffered termite damage.
It was pretty bad (I’m glad ithat sucker hadn’t tipped over!) At that time I also removed a rotten trellis that surrounded the nearby A/C unit (of course I didn’t take a photo of it at the time, so here is my ever so fancy artist’s rendering:) When I tore it down back in 2012, I was left with a spiffy new pergola post and a whole lot of ugly air conditioner (which I am always paranoid about since I worry the kids will throw something inside of the fan or even stick their fingers in!): Back in that original post I had an inspiration photo for what I wanted to build “some day”:believe it or not.. Check out my version: You can see my toddler likes it! The beauty of this design is that it meets the manufacturer’s requirements for clearance and doesn't impede air flow to the unit. What am I talking about? Because the purpose of the A/C condenser is to suck in air and run it over the cooling coils (as fast as possible), if you put anything around the outside (or over the top of) your A/C you force it to work extra hard and greatly lower its efficiency.

You should never put bushes, a plant trellis, fence or anything solid around your A/C for just that reason. That is also why you frequency see lattice around them.. since it allows for a decent amount of airflow and offers a little disguise. Because air is sucked in from the bottom of the unit and blows out via the large fan at the top, that is also why this louver design works so well. Since the louvers are spaced far apart and are angled upward (the direction of the air flow) the air flow resistance is minimal. I also made sure to install my panels 12 inches away from the actual air conditioner, which is the minimum clearance suggested by the manufacturer. Each A/C unit has it's own clearance requirement, so make sure you check before installing ANYTHING nearby.enough talk about A/C efficiency! I am sure you want to know how I built it. It is actually really straight forward. First I measured how tall I wanted the screen to be and cut (4) 1x3s to form the vertical supports for the louvers.

(Mine panels are 36 inches tall). Next I calculated how far apart I wanted my louvers to be and what angle I wanted them to be. I settled on 45 degrees since that allowed me to obscure the view of the a/c best with the least disruption of air flow (plus the math was easiest!) In my case, it turned out that I needed 11 louvers, spaced 3 1/8 inches apart to fill the 36 inch span: Next I measured how wide I needed the screen to be and cut (11) 1x3s which would become the louvers. (My screen needed to 39 inches wide on one side and 37 on the other.. so I cut eleven 1x3s at 39 inches long and eleven at 37 inches long.) The kids helped me prime and paint them before assembly. I knew it would be a pain to paint louvers once they were assembled:To make assembly easy, I cut a couple of 1x3s in 45 degree triangles and used them as a ‘jig’ to support the louvers. I marked off every 3-1/8 inches and lined up the triangle blocks on each mark. This allowed me to maintain the spacing and angles without any complicated math.

I used clamps to hold the support blocks in place and then predrilled through the board and into the end of the louver. I secured each louver in place with two 2-inch deck screws on each end.Then I just repeated the process.. over and over and over. It wasn’t difficult since I only had to line up and clamp the little triangles and then drill, but it still took a while to assemble all 22 slats. (That is 88 holes and 88 screws!) Here are the finished products set out near the A/C. I needed a corner support post, so I installed a pressure treated 2x2 and attached the screens with 2-inch deck screws (I also attached the other ends to the pergola post and the fence): To secure the post to the concrete patio, I used a Strong Tie E-Z Base, which was super easy to use (I will eventually paint it white so it doesn’t stand out) Just like the other pergola post I installed, I used wedge anchors to attach the footer to the concrete. Finally, for a finished look, I added a 1x3 (yes, the top is wider than the louvers) which I mitered at the corner.