outside ac unit kicks on and off
How To Repair Room Air Conditioners 1. Check cord, plug, and outlet. Check for blown fuse or tripped circuit breaker at main entrance panel; 2. Motor overload or safety shutoff. 2. Wait 30 minutes; 3. Check terminals and insulation; if burns are evident, replace switch. If switch looks all right, call a professional. 1. Put on different circuit. 2. Call a professional or the power company. 2. Clean or replace filter. 4. Condenser blocked from outside. 4. Make sure outside of unit is not blocked. 7. Call a professional. Fan runs, butunit doesn't coolif faulty, replace, or call a professional. Unit cools, butfan doesn't run 1. Control switch set wrong. 2. Clean and tighten fan blades. 3. Fan blades bent. 3. Straighten fan blades. 4. Fan motor faulty. 4. Replace fan motor or call a professional. Unit turns onand off repeatedly

2. Clean or replace filter. As you can see, there are many parts that can fall into disrepair on an air conditioner. You can learn how to fix many of these, such as the filter and coils, on the next page.Why is My AC Unit Making a Squealing Noise? When transitioning from winter to spring weather, it could mean any number of things when your air conditioning unit needs some routine maintenance.
how split system air conditioners workWith our last post, we walked you through necessary steps to take in preparing your outdoor AC unit for the more regular usage that the weather shift requires.
high efficiency air handling unit Cleaning and maintaining is one thing, but what if after all that there is still a high-pitched squealing noise?
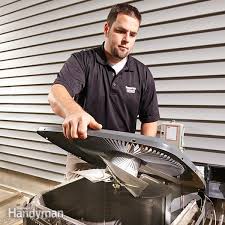
flat panel ac unit
It’s highly more likely that you’ll experience this in the spring, as your compressor/capacitor has been exposed to the winter elements for months at a time (including ice). What could this sound mean and is there an easy way to fix it? If you’re experiencing this issue, it is likely one of three things: the bearings on your condenser fan’s motor, the belt connecting the motor to the blower has slipped, or it’s actually not a problem at all. Here are a few tips to help diagnose the problem and a pointer on how to fix your noisy AC unit. If it’s not a problem – Many units emit a slight squeal under normal operation. This is especially the case when, at this point in the year, it has been sitting for several months and just needs to work out its kinks. A good indication that this is in fact the case is the brevity of the noise. If it’s nothing to worry about then the noise will be slight and only last for a few minutes. If it’s any longer than a few moments and any louder than ‘slight,’ then you should investigate other causes (see below).

If it’s the belt connecting the motor to the blower – Most newer units do away with the belt system. If you have an older unit and happen to know that it is belt driven, then the issue is more than likely that the belts have been worn over the years and have slipped. You’ll hear this noise both outside and coming through the vents inside your home. If this is indeed the cause, your next step would be to replace the belt or call us. If it’s the bearings attached to your unit’s condenser fan – All newer units have direct-drive motors (meaning no belts). These sorts of units use a fan to draw air across the condenser coils located inside of your compressor. If you have a direct-drive motor then you will hear the squealing or grinding coming from your outside unit. This means that the bearings on the fan motor are shot and the motor will need to be replaced. We strongly urge you not to fix this on your own as it could increase the amount of damage to your compressor, resulting in a more costly fix.

As you gear up for cold weather, do you experience a potent smell when you turn on your heater? Visit this blog post for simple DIY ways to identify and fix the odor(s) before the Winter hits! Using a motor lubricant or spray lubricant on the motor shaft to temporarily relieve the noise is a temporary fix. This, however, is NOT a permanent fix and the problem should be tended to by a professional as soon as possible. Your HVAC (AC) unit could be overworked! There are several reasons that this could be the case. Most commonly it is working too hard to decrease the humidity level inside of your home. Click here to learn from us how to decrease your in-home humidity level. We offer whole home dehumidifiers which will significantly decrease its level as well as lengthen the life of your AC unit! That’s where we come in! Schedule an appointment with BR McGinty today to get your AC unit in proper working condition for the spring! And if your AC unit smells funny when you turn it on?

Click here for our input! Or click HERE if it’s leaking!It can be very frustrating to have your car’s AC go out on you, especially on a hot day when you need it most. Luckily there are just a few simple steps that can assist you with diagnosing your vehicle with a non-working AC. Not only will they help you diagnose the problem, but they will also help you have a better grasp on the workings of your car’s AC system, resulting in a repair that is not only speedy but accurate. Before starting any of the following steps towards diagnosis, you will want to make sure that your vehicle is on, with the engine running, with both the gear in park and the parking brake engaged. This will ensure you are also proceeding as safely as possible. Step 1: Turn on the AC. Turn the car’s fan motor on high and press the button to turn on the AC. This can also be labeled as MAX A/C. The AC button has a light on the button that illuminates when the air conditioner is turned on. Verify if this light turns on when you reach MAX A/C.

If it does not turn on, it is an indication that either the switch itself is malfunctioning or the AC circuit is not getting power. Step 2: Verify that air is blowing. Verify if you are able to feel air blowing through the vents. If you cannot feel any air coming through, try switching between the different speed settings and feeling for any kind of air coming through the vents. If you do not feel any air or if you only feel air coming through the vents on certain settings, the problem may lie with the AC’s blower motor or the blower motor resistor. Sometimes blower motors and/or their resistors will fail and stop pushing both hot and cold air through the vents. Step 3: Check the strength of airflow. If you are feeling air and the blower motor is allowing the fans to produce air at all speeds, you next want to feel the actual force of the air coming through. Is it weak, even at the highest settings? If you are experiencing a weak force, then you will want to check your car’s cabin air filter and make sure there is nothing obstructing the airway.

Step 4: Check the temperature of air. Next you will want to check the temperature of the air that the AC is producing. Use a thermometer, such as a meat thermometer, and stick it inside the air vent near the driver side window. This will give you an idea of the temperature of the air that the AC is producing. Typically, air conditioners will blow on cold as low as 28 degrees F but on a really warm day where temperatures soar into the high 90s, the air may only blow as low as 50-60 degrees F. All of these reasons can be cause for a non working air conditioner and would require the enlisting of a certified mechanic as your next step. Step 1: Check for any airflow obstruction. You will first want to check your grill and bumper, as well as the area around the condenser, and make sure there is not anything obstructing air flow. As we mentioned earlier, debris blocking air flow can prevent an AC from functioning properly. Step 2: Check the AC belt. Now we will go under the hood and check the AC belt.

Some vehicles have a belt just for the AC compressor. This check is best done with the engine off and the key out of the ignition. If the belt is indeed there, push down on the belt with your fingers to see if the belt has come loose. If the belt is missing, or if the belt is loose, inspect the belt tensioner, replace and install components and recheck the AC for proper function. Step 3: Listen and inspect the compressor. You can now start the engine back up and return to the engine bay. Be sure to leave the AC set to high or MAX and the blower motor fan on high. Visually inspect the AC compressor. Look and listen for the compressor clutch engaging on the AC pulley. It is normal for the compressor to cycle on and off, however if it is not cycling at all or if it is cycling on/off rapidly (within a couple of seconds) you may be low on refrigerant. Step 4: Check the fuses. If you do not hear or see the AC compressor cycling, check the appropriate fuses and relays to ensure they are functioning properly.

If you discover bad fuses or relays, it is important to replace them and recheck your AC for performance. Step 5: Check the wiring. Finally, if the compressor still does not cycle on and/or off and the AC system has been verified to have the proper amount of refrigerant, then the wiring to the AC compressor and any pressure switches will need to be checked with a digital voltage meter to confirm if these components are getting the power they need to function. Step 1: Turn off the engine. Turn off your car’s engine. Step 2: Locate the pressure ports. Open the hood and locate the high and low pressure ports on the AC system. Step 3: Install the gauges. Install your gauges and start the engine back up with the AC on Max or high. Step 4: Check your pressure. Depending on the outside temperature, your low side pressure should be typically around 40psi and typically the high side will vary from 170psi to 250psi. This is depending on the size of the AC system, as well as the ambient temperature outside.

Step 5: Verify the read-outs. If one or both pressure readings are out of range, this is verification your vehicle has a non working air conditioner. If the system is low or completely out of refrigerant, you have a leak and it will need to be inspected as soon as possible. Leaks are commonly found at the condenser (due to it’s location being right behind the car’s grill and in turn subject to rocks and other road debris puncturing it) but leaks can also appear where pipe fittings and hoses come together. Typically you will see oily dirt around the joints or area of the leak. If a leak cannot be detected visually, the leak may be too small to see, or even deep inside the dashboard. Step 6: Re-charge the system. Once you find the leak and have it repaired, the system needs to be charged with the proper amount of refrigerant and the system needs to be rechecked for proper function. Verifying a non working air conditioner is only the first step in a longer process. Your next step is to find someone with the knowledge, experience and certified tools to get the repair job done safely and correctly.