how to install ac unit video

Shoving all your home theater equipment into a single, closed cabinet makes sense when you want to keep your living room tidy. There's just one problem: overheating.When you have things like a router, gaming console, cable box, and DVD player all mingling in one cabinet, things can get steamy. So much so, in fact, that a lack of air circulation can eventually fry your equipment. (Ring of death, anyone?)The most obvious solution here is to remove the door from your media cabinet, but if you're bent on keeping the appearance of your living room clean, the next best thing is to install a cooling fan.Follow the step-by-step guide and video to install a quiet, temperature-controlled fan that keeps your cabinet cool and your gadgets happy.I recommend a single or dual thermal-controlled fan, depending on the side of your cabinet. ToolsSpeed square measuring and leveling toolMasking tapeDrill and 1/2-inch drill bitScrewdriverJigsawMeasuring tapeMethodStep 1: Determine and mark where the fan will be placed Placement of the fan will vary depending on your needs.

For example, if most of your media equipment is located on the second shelf of your cabinet, you'll want the fan to be placed parallel to that shelf.Once you decide where you'd like the fan to be installed, mark the center point with a pen. Using the masking tape, create an approximate outline of the fan. Then, center the fan unit over the marked center point and masking tape. Using your speed square (or leveling tool), level the fan, and finally, trace the outline of the fan over the masking tape.The purpose of using masking tape is to prevent the cabinet from chipping. It is not entirely necessary, but I do recommend it as a precaution, especially for those whose cabinets have a melamine finish.Step 2: Cut out a hole for your cooling fan It's time to bring out the power tools. First, grab your drill and insert a 1/2-inch drill bit. Drill two holes in diagonal corners of the square you traced. This will make the process of sawing the hole a lot easier.Prepare your electrical saw. Carefully saw on (not below!) the traced lines, using the drilled holes as starting points.

Remove the cutout and check to see that the fan fits. At this point, you should clean your cabinet and remove any saw dust.Step 3: Assemble fan and install This process may vary depending on the cooling fan you purchased, so consult the product manual first. If you're using a Coolerguys cooling fan, attach the fan to the grille and the mounting plate, making sure that the fan is facing the right direction.
ac unit where to buyThen, insert the whole unit into the hole in your cabinet.
names parts ac unitUsing your drill and a 1/16 twist drill bit, drill four shallow holes in the corners of the mounting plate.
hvac air conditioner reviewsThis will make it easier to insert the screws into your cabinet. Finally, with your screwdriver, insert the screws into the drilled holes to mount the fan to your cabinet.

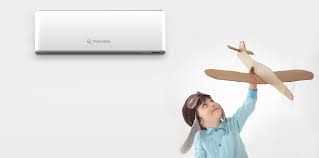
Consult the product manual for the final steps on powering up your fan.87 percent of residential buildings in the United States have some sort of air conditioning according to the Energy Information Administration (EIA). The most popular AC units are wall mounted AC units and central air conditioners Most of these AC units are installed in the Midwest and South of the United States such as in cities like Denver where temperatures can soar in the summer months. Wall mounted AC units are used to provide cooling for a small space like a room whereas a central unit is used to heat the whole house. If you are in Denver and are looking for an AC install, try a rooftop A/C unit instead. Any rooftop AC install is much more efficient than other types of AC units. This is because the AC unit has to perform less work to push the cold air into the space as cold air naturally goes down while hot air rises. Hence fan speeds are lower in a rooftop AC install and this in turn reduces the amount of power required and the utility bills later on.
Unlike a central unit, rooftop air conditioners are not split units and all the components are contained in one unit making it easier to maintain and repair the AC install. As of now, rooftop AC units are very popular in commercial spaces as they can cool a large space without interfering with an existing HVAC unit. As a result they are also becoming popular in residential spaces. You need to consider the weight of the rooftop ac install before installing one in your house. Honeywell Wi-Fi Programmable ThermostatsSpeak to an expert Or send us an email Thermostats & Indoor Air Quality Customer Support: Monday – Saturday 7:00 AM – 11PM EST Sunday 10AM – 7PM EST Training and Installation Videos See all Honeywell Home training videos Visit the Lyric Support Community Find a Professional Installer Use our locator to find a local professional who can help with your installation. Monday, August 15, 2016 – 12:45 p.m. (CDT): Some users may have experienced connectivity issues with Total Connect Comfort and Lyric Thermostat applications.

Your thermostat would have performed normally, but some users would not have been able to change settings from their applications or web portal, and geofencing events would not have triggered. The easy way to dispose of mercury thermostats. Plug the wires into the labelled ports on the bottom of the CoolBot. The Heater wire is the one with the RED tip. The 2 sensor wires are interchangeable. The one plugged into the Fins port becomes the Fin Sensor. The one plugged into the Room port becomes the Room Sensor. Plug them in and out a couple times. Sometimes they don't “seat” all the way in the first time. A/C and CoolBot Positioning: Since cold sinks, install the A/C unit high up in your cooler (bottom of the A/C >5 feet/1.5 meters). If you have a rectangular room, it's important the A/C blows the long way (i.e. installed on the shorter wall). Follow your A/C unit installation instructions. The A/C unit should be tilted slightly, about 1" lower in the back (exterior) than in the front (interior).

Some bigger A/C units have shipping screws so the air conditioner can't slide out of its metal cabinet. Removing them before installation makes annual cleanings easier. Hang the CoolBot on the control panel side of the A/C with the bottom in-line with the bottom of the A/C to make it easier to connect the wires to the A/C. Remove the Air-Filters from the front fins of the A/C unit. The filters drastically reduce cooling power, so take them off. Instead, clean your fins 1-3 times a month, or when they get dirty (see Troubleshooting). We recommend removing the plastic grill as well if you can. Note: Some A/C units have a postage-stamp size “fresh air vent” located where air blows out. If applicable, ensure it's closed. Find and Free your A/C’s Temperature Sensor. It’s the only thing attached to the front fins/grill of your air conditioner. Remove both clip and sensor from the fins. Note: A small number of A/C units use a metal temperature sensor and have no digital display.

In that case CoolBot cannot function. Buy another A/C unit. Connect the red-tipped CoolBot HEATER to the Air Conditioner’s Temperature Sensor. Use the short (2 inch square) piece of foil to keep both together snuggly, lying right next to each other like 2 fingers pointing the same direction within the foil [see image]. Make sure they dangle away from the fins & flow of the air and hang free, not touching anything cold or metal. (You can put a wire tie around the 2 wires (1 inch before the foil) to keep the wires from getting pulled apart.) Insert CoolBot FIN Sensor. Take the wire coming from the port labelled “FINS” and stick just 0.3 inches (0.7 cm) of the TIP of that sensor into the front metal fins of the air conditioner, about 1” from the bottom and near the center (horizontally). It must not touch a coolant pipe directly. You want to be between the bottom 2 horizontal cooling pipes. You must use a screwdriver / pen / pencil to open the fins up first. If you just force the sensor in, you'll damage it.

Pinch the fins lightly around the sensor so it doesn't fall out. Plug in the CoolBot. Set your goal temperature. Default is 42⁰F (5.5⁰C). Turn your A/C unit on. Set the temp on your A/C unit as low as it can go. (60-65⁰F) and make sure your A/C unit is set at the highest fan speed and in “COOL” mode. If your A/C Has a Secondary Sensor, Remove It. This only applies to some A/C brands, including most GE, Kenmore, Frigidaire Comfortaire, Danby and all “mini-split-type” air conditioners. These units have a hidden second sensor you need to remove and let “hang free.” Unplug your air conditioner. Look for one heavy electronic wire often on the same side of the A/C as the control panel. It will plug into a little cup soldered onto one of the coolant tubes. Either grab it with your fingers to unplug it or use a tool that is not sharp. Don't cut the sensor! It is OK to cut the plastic tie downs to free the sensor. For rooms above 36⁰F, just let that sensor hang free outside the body of the A/C unit so it doesn't touch anything metal.