how to build ac unit

Ed. note: We've covered the homemade air conditioner territory before on Lifehacker, but HackCollege's Kelly Sutton offers this awesome video guide to the DIY, dorm-legal air conditioner to help students (or anyone trying to save a few bucks) stay cool. Many campuses have strict policies regarding portable air-conditioners. Because A/C ain't cheap, schools worry that students would overcool their rooms and increase the electricity bill (after all, you don't pay utilities for your dorm room)—or maybe admins are worried about improperly affixed units falling off the sides of buildings. Either way, some campuses are unbearably hot during the earlier parts of fall and give students no way to remedy the situation. When you have no other option, just build it yourselfBelieve it or not, it's possible to build your own air conditioner for about $40. Well technically, it's not an air conditioner; it's more of a heat-concentrator. It will cool even the hottest dorm room to a nippy 60 degrees Fahrenheit in no time.

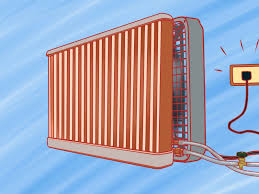
To get started, you'll need to make a trip to the hardware store. You will be building a unit that absorbs heat into some water, allowing you to quickly dispose of that water outside.MaterialsA floor-standing fan like this one (although not as expensive)Some 1/4" copper tubing. Some 1/4" inner-diameter rubber tubingAbout 50 zip-ties2 small hose clamps2 bucketsTools InstructionsDetach the face of the fan and put it on your work bench or table.Grab your zip-ties and copper tubing. Start coiling the copper tubing around the face of the fan. Use the zip-ties about every 6 inches to attach that section to the fan face. Make sure that both ends shoot out the bottom of the fan's face.Take your hose clamps and secure the rubber tubing onto either end of the copper tubing. If you need to cut your copper tubing, don't forget to sand the edges before you start working with the tubing. Freshly cut copper is very sharp.Fill up one of your buckets with water.Position the bucket full of water on a ledge or a desk—someplace above ground level.

Siphon the water through the contraption to the bucket on the floor. (Bernoulli's Principle in action!)Turn on the fan.After a few minutes, all of the water will drain into the bucket on the floor. You can now dispose of this lukewarm bucket as you see fit. Repeat a few times to get your room extra chilled.Many ways to skin a catThis is just one way of creating a dorm room cooling device. You can also create something more akin to a "swamp cooler" if you're looking for something a tad simpler. A swamp cooler is just a device that usually just moves air over a body of water to aid in evaporation and spreading the chill. This isn't so great if you're looking to keep the humidity down. Or you can always just seek inspiration from Mr. Freeze.The school-bound productivity nuts at weblog HackCollege will be joining us all week to offer their perspective on making the most of your Back to School regimen.If you can't take the heat - build your own air conditioner!One man found a way to cool off without spending big bucks, constructing his own makeshift AC from cheap, simple supplies.'If you don't have AC and want to save some money to cool down a room in your house, don't spend $300 on a portable air conditioner,' he said in a new how-to video from Household Hacker.
'Just build your own for $8 and 10 minutes of your time.' Cheap chill: Household Hacker offers a step-by-step video guide to building a homemade 'air conditioner' for just $8, using these supplies Step one: Trace lines tightly around two vents on either side of the Styrofoam cooler lid; if using a weaker fan, just use one vent Styrofoam coolerTwo dryer ventsSmall household fanIce-filled water bottles and bags of ice cubesSharpie marker or pen for tracingKeyhole saw or kitchen knife for cuttingVacuum for cleaning To get started, the video's narrator says that anyone who attempts to put together his or her own homemade air conditioner will need a standard Styrofoam cooler
how to turn ac unit on, one or two dryer vents, and a small fan.'First, we're gonna need to place the vents on the lid of the cooler, and trace around them, because we're gonna be cutting holes in just a second,' he says.
top quality ac units
He uses two vents and sits them on opposite sides of the lid, but recommends limiting to just one vent if using a weak fan.Then, the narrator draws with a Sharpie marker along the outside of each of the vents, explaining that lines should be traced as closely to the vents as possible.'Once that's done, grab your fan and also trace around that,' he continues. 'Now we just need to do a little cutting,' he says. While he used a small keyhole saw from his toolbox, he explains that a simple kitchen knife would work just as well.
no water coming from ac unitHe continues: 'Just carefully cut out all the holes that you traced, one by one. For the fan hole, I went inside the lines a bit, so it has something to sit on top of. It doesn't have to be perfect, but you want to make sure that the air from the fan has a direct path into the cooler.' Step two: Trace around the outside of a small house fan, placed in the center of the lid

Step three: Cut out around the traced figures of the vents with a keyhole saw or a kitchen knifeAfter cutting, he suggests using a vacuum to suck up stray Styrofoam. Otherwise, the fan may later blow it all over the room.Now for the cooling element. The narrator instructs viewers to put several water bottles in the freezer until they are frozen solid.Then, he demonstrates placing the bottles of ice - along with several ice packs - inside the cooler, before closing the lid. Step four: Cut slightly within the lines traced around the fan so it has something to sit on; the fan will be placed face-down on the lid Step five: Fill the Styrofoam cooler with bottles and bags of ice, then close the lid Step six: Place the fan and vents in their holes in the lid and turn the fan on; the air will blow off the ice and out through the vents, cooling the roomWith the vents and fan in place in their respective holes, the man turns the fan on, explaining that the air blows over the ice and exit through the vents, creating an air conditioning effect.