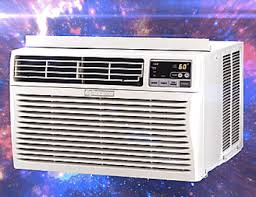
ac window unit diagram

Manuals Brands Panasonic Manuals Air Conditioner CWC83HU - WINDOW AIR CONDITIONER Manuals and User Guides for Panasonic CWC83HU - WINDOW AIR CONDITIONER. We have 1 Panasonic CWC83HU - WINDOW AIR CONDITIONER manual available for free PDF download: Installation And Operating Instructions ManualR.H. Witt Heating & Sheet Metal provides expert solutions to residential and commercial comfort in Glenview and across the North Shore and Northwest Suburbs. Family owned and operated, we believe your home or office should be comfortable from corner to corner, top to bottom, all year round. We not only deliver perfect temperature control, we offer the skilled services that ensure affordable, reliable, and sustainable performance from your heating and cooling system. Whether you’re looking for design, installation, replacement, seasonal maintenance, or repair of all types of HVAC equipment, let our team of NATE-certified specialists optimize your rewards. We are extremely proud to have earned recognition as a Carrier Factory Authorized Dealer.
By consistently meeting strict standards of factory training, business practices, and customer approval ratings, we offer our customers a range of products, universally recognized as the gold standard of the HVAC industry.
hvac home unitsFrom the most sophisticated heating and cooling technology on the market, to all of the bells and whistles that change daily life from a grind to a pleasure, we make sure you find the right system for your highest expectations.
cost of new hvac unit for homeTrust R.H. Witt Heating & Sheet Metal with complete confidence.
plug in ac unit for carsWe stand behind all of our work with a one year labor warranty and a lifetime workmanship warranty. When you call on R.H. Witt Heating & Sheet Metal, all of your heating and A/C service needs are answered with convenient scheduling, prompt arrival, and quick turnaround.

Foot coverings, floor coverings, and conscientious clean up at completion, are all part of a job well done. We specialize in Aeroseal duct sealing to effectively combat issues with air quality, discomfort, and excessive energy bills, and a full range of water heating services. For HVAC installation projects that require metal ductwork, our full service sheet metal shop ensures top quality materials, no delays, and accurate customization. For any heating, cooling, electric or water heating repair needs, our licensed technicians are always on-call, providing 24/7 Emergency Service across Glenview, Northbrook, Highland Park, Glencoe, Winnetka, and Wilmette, IL. Established in 1966, R.H. Witt Heating & Sheet Metal is proven reliable and totally Dedicated To Your Comfort.Air Conditioners: Expert and User Reviews Prev4 Best Air ConditionersSmall Air ConditionersBest AC for Medium RoomsBest AC for Large RoomsBuying Guide Select your model and see a list of genuine parts that exactly fit your air conditioner.

We'll ship your order fast so you can repair your air conditioner and cool down. Shop Friedrich PartsSelect From 1004 Models Popular Friedrich Models Click your model to find parts, owner's manuals, diagrams and more. Friedrich Model:MW12C1F 34 parts available Find parts for this model Top parts for this Air ConditionerFiltersControlsHoses, Valves, and R..Motors and BladesFriedrich Model:US14B30A 48 parts available Find parts for this model Top parts for this Air ConditionerMotors and BladesFiltersFramesControlsFriedrich Model:CP05A10 69 parts available Find parts for this model Top parts for this Air ConditionerFiltersMotors and BladesCapacitorsControlsFriedrich Model:ZQ10A10 53 parts available Find parts for this model Top parts for this Air ConditionerKnobsMotors and BladesFiltersControlsFriedrich Model:US10B30 9 parts available Find parts for this model Top parts for this Air ConditionerControlsPanelsGE PartsFriedrich Model:CP05N10 40 parts available Find parts for this model Top parts for this Air ConditionerFiltersHardwareMotors and BladesControlsFriedrich Model:CP10C10 37 parts available Find parts for this model Top parts for this Air ConditionerFiltersMotors and BladesControlsCapacitorsFriedrich Model:CP12C10 53 parts available Find parts for this model Top parts for this Air ConditionerFiltersMotors and BladesControlsFramesFriedrich Model:ZQ08A10C 96 parts available Find parts for this model Top parts for this Air ConditionerFiltersMotors and BladesFramesControls

All 1004 Friedrich Air Conditioner models Don't know your Air Conditioner model? Browse By Category.Some of our parts aren't categorized yet, for a complete list find your model.Bags Belts Capacitors Charbroil Parts Chargers and Cords Condensers Controls Covers Doors Drive Belts Filters Frames Gaskets Grates, Heat Plates, and Angles Handles Hardware Hoses, Valves, and Regulators Knobs Lights Motors and Blades Other Accessories Other Parts Other Powerwheel Parts Panels Parts Bags Transformers Tubing Wheels Wheels and Casters Whirlpool Parts Windows Copyright © 2000 - 2016 Appliance Factory PartsOkay technically it’s not an air conditioner it’s an evaporative cooler aka a swamp cooler but definitely provides a level of cooling to your room. I’m not going to lie to you. This is not a 2 minute fix, nor is it for the faint of heart, and finally it’s not the most attractive of contraptions (as was evident from the laughter from my wife and her girlfriend) but it does work.

Quite the sales job Paul so why did you build it? As they say necessity is the mother of invention and we are currently experiencing a heat wave in Seattle where it’s expected that we will break the record for hottest day in our history at 101 degrees. If you know Western Washington State you know that we can take the rain for a year straight no problem but when the mercury heads past 80 degrees the apocalypse is soon to follow. I thought I might take a casual stroll this morning to our local Home Depot to see what kind of cooling options were available. I’m not kidding when I tell you it looked like Whoville on Christmas Day after the Grinch had come. There was a bare area of concrete with a tiny piece of ripped cardboard the only evidence that they carried any form of AC unit or fan. So after a few unsuccessful calls on Craigslist I started scheming to build my own cooling unit. As you may or may not know evaporative coolers can raise the humidity level in your room hence the name swamp cooler.

They are more applicable to less humid areas like my home state of Washington. Odds are if you live in one of the more humid areas you’ve already got an air conditioner that will also act as a dehumidifier. Components of a Homemade Air Conditioner Essentially what we’ll be doing is using the power of evaporative cooling and a fan to bring down the temperature in your room. In this case we’ll be using ice water stored in a cooler that will then cycle through a copper loop in front of a box fan. I’ll leave it to you to head to wikipedia to read up on how the process works, it’s not unlike you sweating to cool down. Myself I’ve done enough sweating so I’ll let the air conditioner do it for me. (Note: this is the perfect project to do some scrounging and modify your design and tailor to whatever you may have on hand that would fulfill the same function). Okay for this project you’ll need to assemble the following components: A Fan (box fan is ideal) A cooler (you could use a Styrofoam cooler or whatever cooler you may have on hand)

An aquarium pump (or a pond pump, the higher the Gallons Per Hour the more cooling you’ll get mine is a 132 GPH, also be sure your pump has enough power to push the water to the height required to reach the top of your coil) Copper coil tubing (the particular type of tubing I used was 3/8″ outer diameter copper coil – 20 feet) Vinyl tubing (my pump called for 1/2″ Inner Diameter tubing about 10 feet worth. Hopefully you get better tubing then I did I believe mine is the autokink brand) Reducers and fittings to connect your copper coil to your vinyl tubing and ultimately to your pump. If you are unsure a conversation with a hardware store plumbing expert should get you going in the right direction. They were terribly excited about my project so they were glad to help. (I used 2 1/2″ to 3/8″ couplers that were then fitted with 5/8″ threaded couplers and then screwed in two 1/2″ barbed brass adapters to connect the tubing, finally I used 3 1″ hose clamps to firm it all up)

Wood for making box fan outriggers Zip ties for attaching the tubing to your fan Assemble the Air Conditioner First you need to get the copper tubing laid out and get your fittings in place. It was a simple matter of 6 screws holding the protective screen on my box fan so I was able to easily remove it and use it for laying out the copper tubing. Since the copper tubing was already coiled it was a simple matter to gradually and carefully bend it into a spiral. Give yourself some room between each circle for more surface area. Attach the fittings to the copper tubing. In my case I needed to solder the joints between the copper tubing and the fittings. You might be able to find some solderless compression type fittings depending on your materials and hardware store availability. That would certainly speed things along and would allow you to avoid having to sweat the fittings together with some form of torch. I prepared all the fittings by sanding the copper tubing and reaming the fittings.

I then applied some solder flux to the inside of the fitting and the outside of the tubing. I then proceeded to heat the fitting with my torch until it was hot enough to melt the solder, then I applied the solder. Repeat this for the the other end of the tubing. Now that the fittings were in place I screwed in the barbed adapters for my vinyl hose after applying some Teflon tape to the threads. The vinyl tubing slipped over the barbs and then I added two screw-type clamps to the barbs. The pump had a special adapter that I inserted into the vinyl tubing and then again used a screw clamp to secure the tubing. Now is a good time to test your setup for leaks. Fill your cooler with some water, submerge the pump and connect the tubing to your pump. You then run the other tubing back into the cooler. Fire it up and make sure it works like you expect. Now you need to attach the copper tubing to your fan screen. This is a simple process, just plan where you want your tubing to enter and leaveyour setup and then start attaching it with the zip ties.

I put about 4 for each circle for good holding power. You can also fine tune your coiling as you go. Once you’re done attaching the tubing to the screen you might want to build your self some outriggers for your fan. Mine was a bit tipsy to begin with so I cut up part of a 2×4 about 16 inches long and screwed to the bottom of my box fan. Reattach the fan screen with the original screws Now you need to figure out how you are going to get your vinyl tubing into your cooler. You’ll need 3 holes, 1 for the inlet to the copper tubing, 1 for the outlet and 1 for the pump power cord. I had a drill bit the same size as my vinyl tubing so it was a straight forward process, just make sure it’s in the lid or at the top of the cooler, obviously you don’t want water leaking out. Okay you should be ready to give her a try. Operating the Air Conditioner Alright you’re going want to put your fan and cooler in place, get your tubing cabled appropriately and you’ll want to get some form of pan or something underneath your fan to catch the condensation from the coil.